Support
Set up Bambu Bar. In a minute
Bambu Bar finds your printers on the network and, when Bambu Studio or OrcaSlicer already knows them, their access codes too. Here's every step, and the optional extras after it.
In short
- Check you have macOS 26 or later and the printer on the same local network as your Mac.
- Move Bambu Bar.app to Applications and open it.
- When macOS asks to find devices on your local network, click Allow.
- Pick your printer from the list (or Add All when your slicer knows several). If the access code isn't filled in, type the one from the printer's screen.
- Click Connect. Progress appears in the menu bar as soon as the printer reports in.
Before you start
- A Mac with macOS 26 Tahoe or later, Apple silicon or Intel.
- A Bambu Lab printer on the same network as the Mac. All 15 models work, in cloud mode or LAN Only mode. No Bambu Lab account sign-in is needed.
- The printer's access code, if Bambu Studio or OrcaSlicer on this Mac doesn't already have it. Where to find it.
1. Get the app
Buy the supporter license on the download page. After checkout, your purchase account has the app download and your license key. The Mac App Store edition is sold separately and installs from the App Store.
2. Install it
Unzip the download, move Bambu Bar.app into Applications and open it. It lives in the menu bar: closing its window keeps it running there, without a Dock icon.
3. Allow the local network
macOS asks whether Bambu Bar may find devices on your local network. Click Allow: without it, Bambu Bar can't see or reach any printer, and it tells you so with a button to the right switch. You can change it later under System Settings → Privacy & Security → Local Network.
4. Add your printer
The setup page lists the printers Bambu Bar hears on your network.
- Pick yours, or choose Add All when your slicer already knows several printers: Bambu Bar sets them all up at once.
- Not listed? Choose Enter address manually and type the printer's IP address from its screen. Bambu Bar reads the rest from the printer.
5. The access code
Bambu Bar needs the printer's 8-character access code, and usually finds it on its own:
- Bambu Studio or OrcaSlicer on this Mac: the direct version reads the codes they saved. The Mac App Store version asks you to choose the slicer's folder once.
- Slicer on another Mac: drop that Mac's
BambuStudio.confonto the setup page. - No slicer: read the code on the printer's screen, in its network settings.
Bambu Bar only reads the slicer's settings and never changes them. Codes are kept in your macOS keychain and only ever sent to their printer.
6. Connect
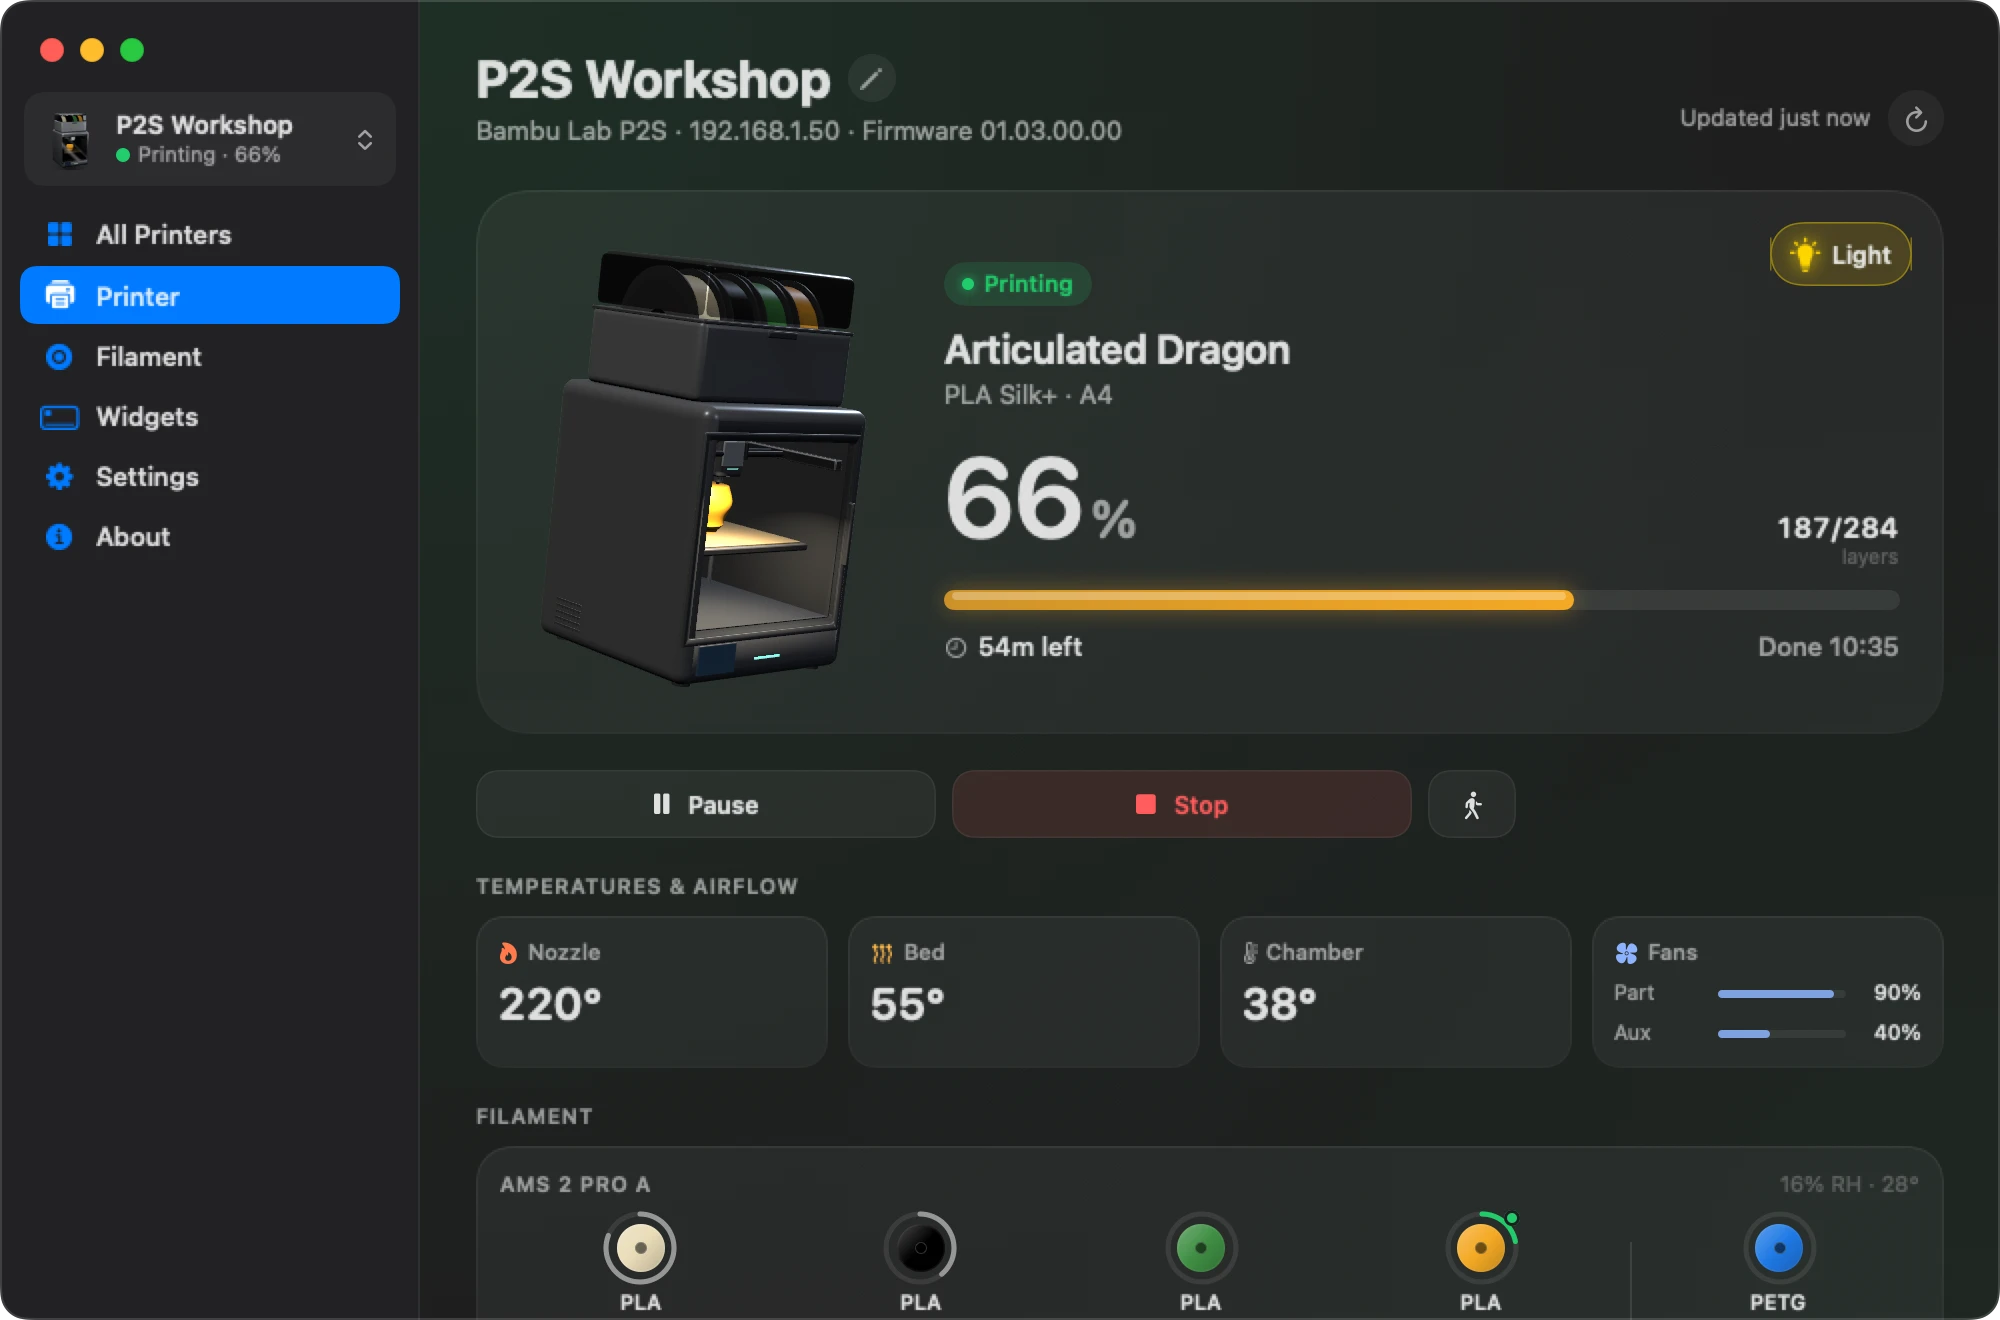
Click Connect. The menu bar shows progress and time left as soon as the printer reports in; click it for the full panel. Open at Login keeps Bambu Bar running after a restart.
Optional: activate your supporter license
Open Bambu Bar → Manage License…, paste the key from your purchase account and choose Activate. It enables in-app updates and the Hero Supporter badge. Printer monitoring works without it.
Optional: the camera
Turn on Settings → Camera → Show the printer camera, then the camera for your printer on the Printers page. X1, H2, H3C, P2S and X2D printers also need LAN Only Liveview on. See the camera on your Mac.
Optional: pause, stop and speed
Reading status works in any mode. To pause, resume, stop or change the speed from your Mac, the printer must be in LAN Only mode with Developer Mode on. Until then the buttons show a lock. See why controls are locked.
Optional: widgets and notifications
- Widgets: right-click the desktop, choose Edit Widgets…, search for Bambu Bar and drag in a size. See desktop widgets.
- Notifications: choose which ones you want on the Notifications page. See print notifications.
If something doesn't work
- No printers in the list: check the Local Network permission and that the Mac isn't on a guest Wi-Fi or VPN, then use Enter address manually.
- Access code rejected: read it again on the printer's screen; it changes after a factory reset.
- More in Support.
- Still stuck? Email support@clevermechanisms.dev with your printer model, your Bambu Bar and macOS versions, and what happened.
Questions, answered
Do I need a Bambu Lab account?
No. Bambu Bar connects to the printer directly on your network with its access code. The printer can stay bound to your account and in cloud mode.
Do I need Bambu Studio installed?
No, but it saves a step: when Bambu Studio or OrcaSlicer is on your Mac, Bambu Bar reads the access codes they saved. Otherwise you type the code from the printer's screen.
Does it work on an Intel Mac?
Yes, on Apple silicon and Intel, with macOS 26 Tahoe or later.
How do I add a second printer?
Choose Add Printer… in the Printer menu or on the Printers page, or Add All during setup when your slicer knows several printers. See multiple printers.
Read next
- Access code and IP addressWhere your printer shows its 8-character access code and its IP address, and how to use them to connect from your Mac.
- The printer camera on your MacYour Bambu Lab printer's live view in the menu bar, the main window or a floating window, and how to set it up for your model.
- Developer Mode and locked controlsWhy pause, stop and speed show a lock in Bambu Bar, what Developer Mode changes on the printer, and whether you need it.
- Desktop widgetsSmall, medium and large Mac widgets with your print's progress, time left, temperatures and filament, one per printer if you like.
- Get Bambu Bar for Mac: Download and LicenseGet Bambu Bar for macOS 26+. Check the requirements, the optional $9.99 supporter license, installation steps and how to reach an existing purchase.


Stop walking to the printer
Track Bambu Lab print progress, time left, temperatures, AMS filament and the live camera on your Mac. Get print alerts and desktop widgets without opening Bambu Studio.
Print progress, alerts and filamentmacOS 26+, Apple silicon & Intel Windows & Linux coming next